To make sure Spotify stream all your favorite songs, you can create a playlist for yourself. Have you accidentally deleted your favorite playlist or regretted soon after deleting your Spotify playlist? The simple remedy is to undo the deletion with the built-in recover playlist features of Spotify. In the following paragraph, I would like to show you how to recover deleted playlist from Spotify.
Part 1. Recover Deleted Songs/Playlists on Spotify
No matter you use Spotify desktop client or the Spotify web player, you can find the corresponding button to restore deleted Spotify playlists.
Step 1. Enter Spotify Account Page
For those who use Spotify desktop client, you can hit on the button next to your profile name to bring up the drop-down list. Click on "Account" to enter Spotify Account page.
For Spotify web player users, please click on your username at the bottom of the interface. Then, hit on "VIEW ACCOUNT" and you will be brought to your account page.
Step 2. Select "Recover playlists"
In the web interface, you will see several options provided related to your account. Click on "Recover playlists" from the left panel.
It is the eighth track from their debut album Hybrid Theory in 2000. The song is mainly based on one person's failure. In the End is Linkin Park's highest charting single in most countries.
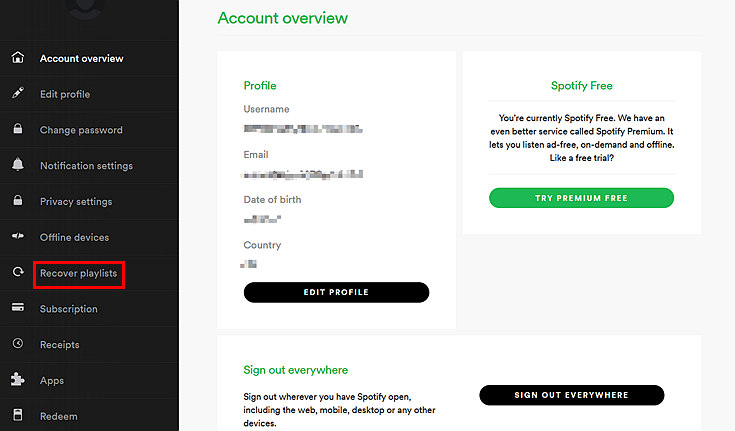
Step 3. Recover Deleted Playlists of Spotify
Then, Spotify will list all the playlist you've deleted including info like deleted date, playlist title, number of songs as well as the restore button. Hit on the green "RESTORE" button to undelete Spotify playlist.
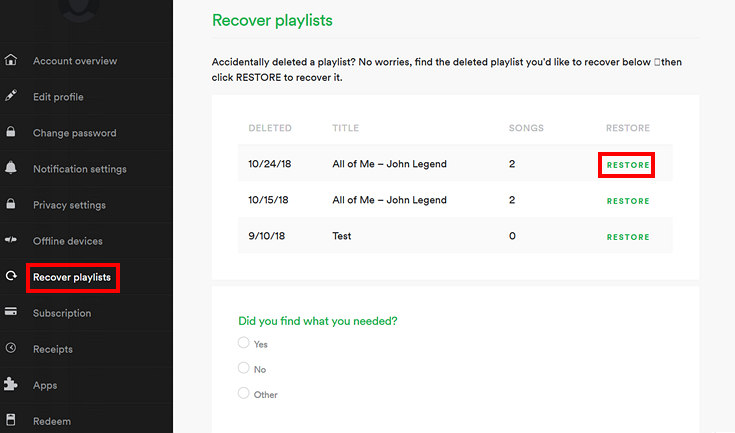
Note: If you regret soon after deleting your playlist, hit on the shortcut on your keyboard "Ctrl"+ "Z" to withdraw the deletion. If you only want to recover specific Spotify songs, you can restore the deleted playlists and delete it after all the deleted songs are back up to your computer. Just follow the next part to see how.
Part 2. Back Up Spotify Songs and Playlists
It is highly recommended that you back up Spotify music to your computer to prevent accidentally deleting your Spotify songs. It is not complex at all. What you need is TuneFab Spotify Music Converter.
TuneFab Spotify Music Converter enables you to convert OGG Vorbis to MP3 or other popular music formats on your computer. Even if you are not a premium subscriber of Spotify, you can download Spotify music to your computer as a backup. It is your perfect choice to back up Spotify music to avoid accidentally deleting songs. More importantly, the program will keep your ID3 tags and metadata to keep your library organized. To customize audio quality to play on different devices, you can set bitrates and sample rates as you wish. Let's see how to back up Spotify music to computer.
Step 1. Launch TuneFab Spotify Music Converter
Download and install TuneFab Spotify Music Converter on your computer. Launch the program and Spotify will be brought up if you have installed it previously.
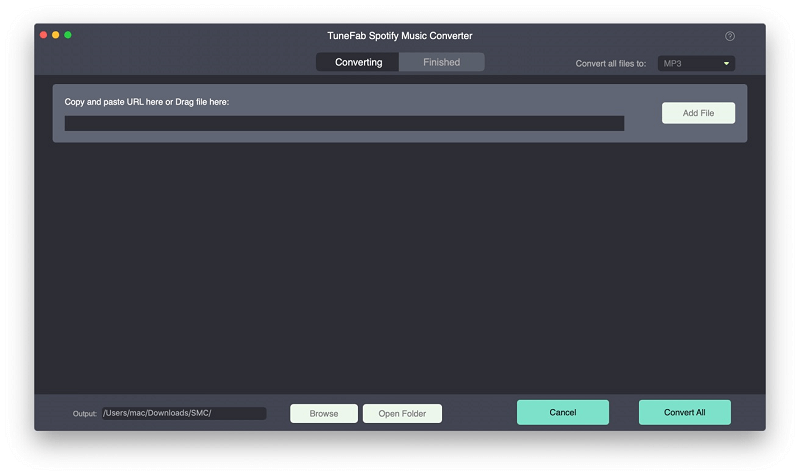
Step 2. Add Spotify Songs to the Program
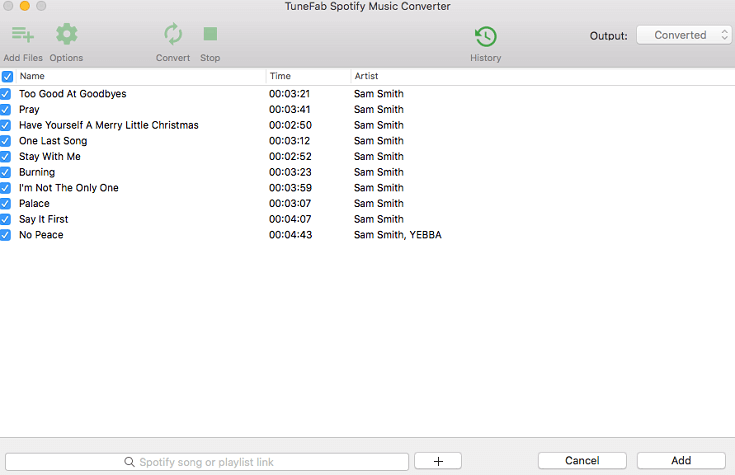
As you can see from the screenshot above, you are allowed to drag songs, playlists, artists, tracks, etc. from Spotify. You can also copy and paste the song/playlist link to the search box at the bottom of the interface. After selecting Spotify playlist you want, hit on "Add" to add songs into the program.
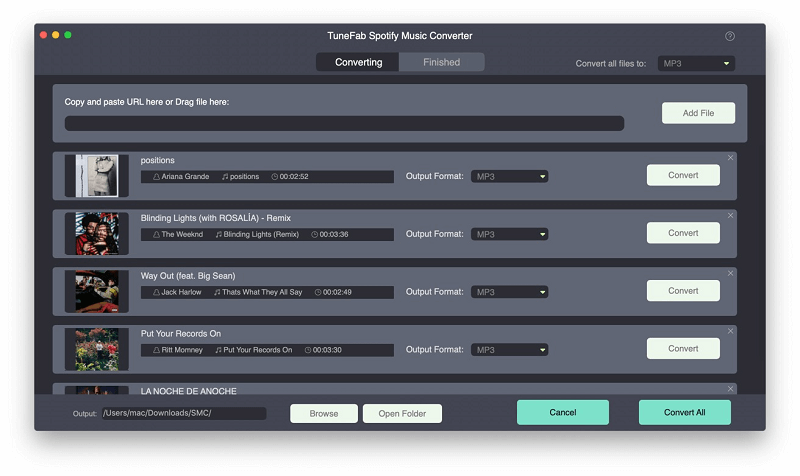
Step 3. Check Songs before Converting
Now the songs you've added will be listed in the program as below. Double check and hit on "Add" button at the bottom.
Step 4. Set up Output Format of Spotify Music
As we known, official Spotify music is in OGG Vorbis format. However, the OGG file is DRM-protected and cannot be played on unauthorized devices. So, you'd better convert songs into the popular MP3 format to save Spotify music to external hard drive, computer or other devices.
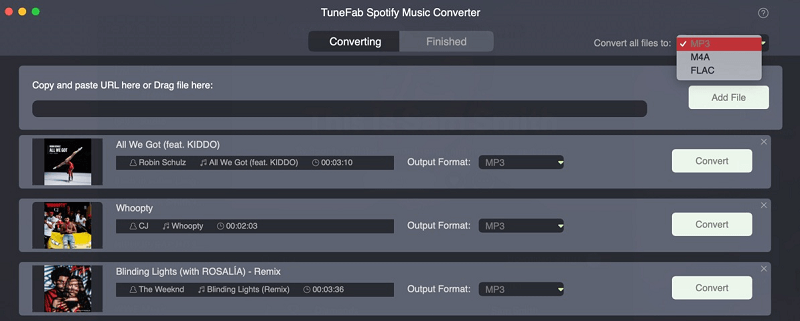
Note: Select your output folder as well so that you can locate your converted Spotify songs with ease. Go to "Options" > "General" > "Select..." to browse and select the folder you like. Click "Save" and move on.
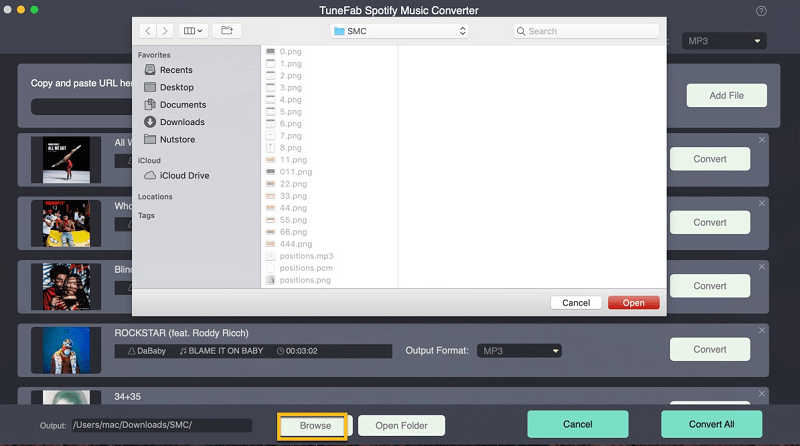
Step 5. Start Converting Spotify Music to MP3/MAV/M4A/FLAC
Click "Convert" to start converting Spotify songs to your computer. Wait patiently till the end of the conversion. It won't take much of your time unless you have a great number of songs to back up.
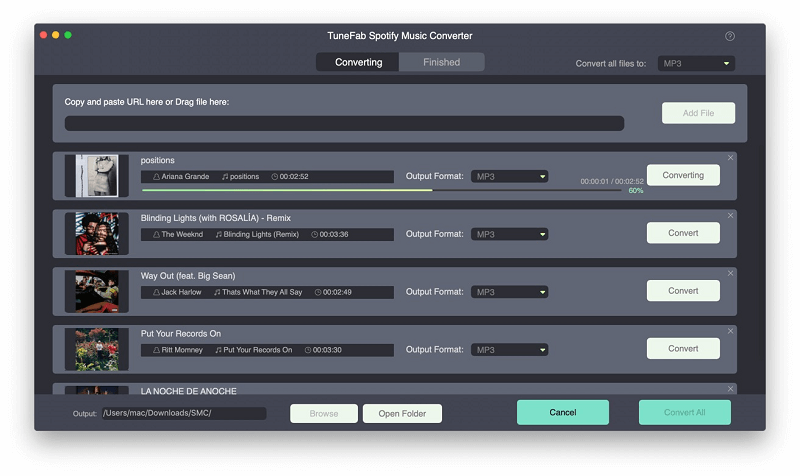
Step 6. Check Backup Files
Now you can check your backed up Spotify music in the "History" section. You can hit on the blue folder icon to take a glance of the backup Spotify music.
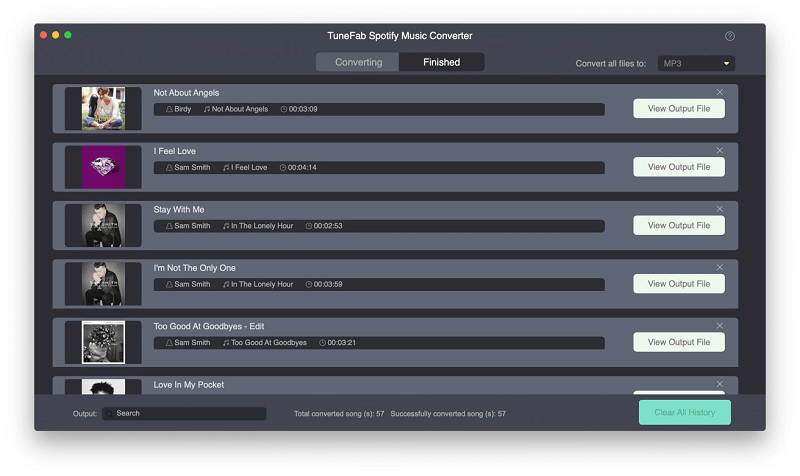
Note: To back up Spotify music to external hard drive, you just need to plug in your external hard drive and set the hard drive folder your output folder. After the process, you will find the songs you chose backed up to an external hard drive.
Now your Spotify playlist/songs are backed up to your computer and you don't need to worry that you accidentally delete your computer or regret deleting songs soon after the deletion.


