When your Spotify album and playlist reach the end, Spotify will automatically recommend songs you might be interested in if autoplay feature is enabled. But sometimes you might don't want Spotify to keep throwing out tunes because chances are you don't like the songs Spotify recommends. Moreover, if you are enjoying Spotify somewhere Wi-Fi connection is not available, autoplaying songs that Spotify recommend will consume you a great deal of cellular data. So, how to turn off Spotify autoplay so as to save your cellular data? Let me show you the simple steps on mobile phone and computer.
Part 1. How to Turn Off Spotify's Autoplay on Phone/Tablet
Step 1. In the Spotify app, go to "Your Library" from the bottom menu of your Spotify app.
Step 2. Hit on the gear button at the top right corner.
Step 3. Then, you will see several options listed. Hit on the "Playback" option.
Step 4. You will see "Autoplay" option which enables you to "enjoy nonstop music. We'll play you similar songs when your music ends."
Step 5. To disable the autoplay function on Spotify, just turn off the toggle next to it.
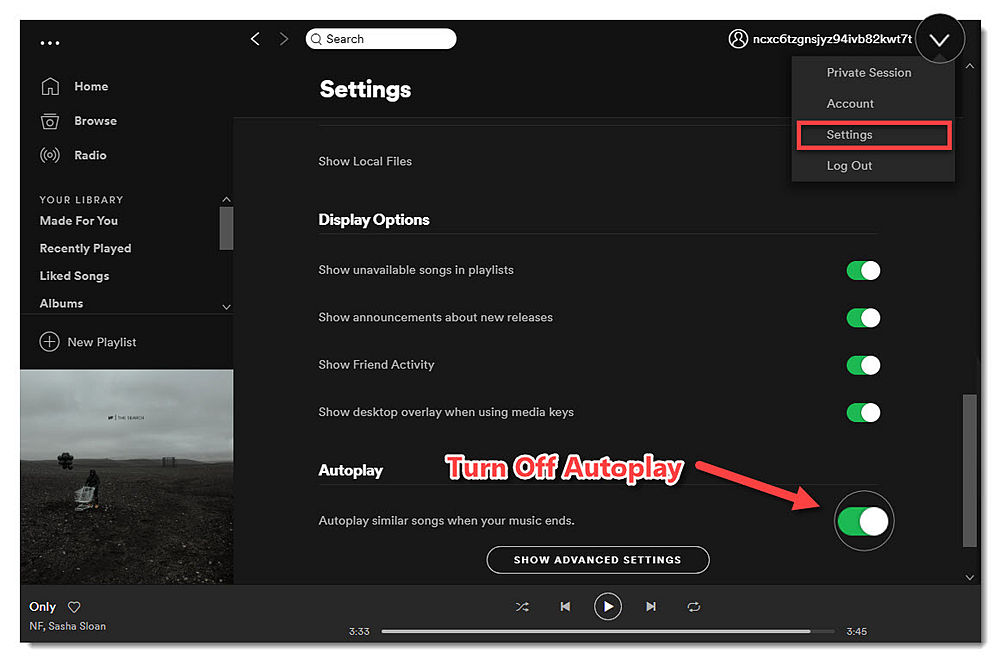
Part 2. How to Turn Off Spotify's Autoplay on Computer
The process to disable Spotify Autoplay for desktop is similar to that on your smartphone and tablet.
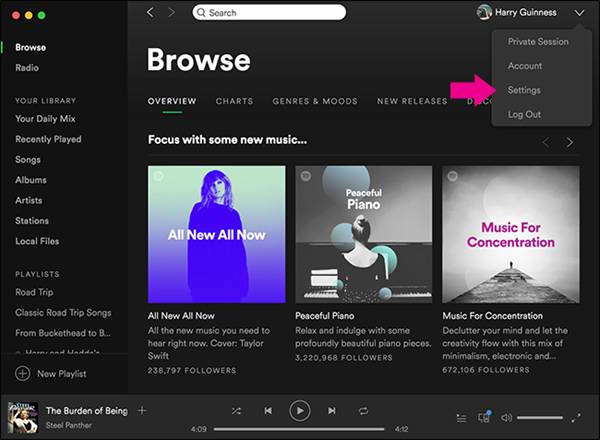
Step 1. Click on the drop-down icon from the top right to show the menu. Choose "Settings" and move on.
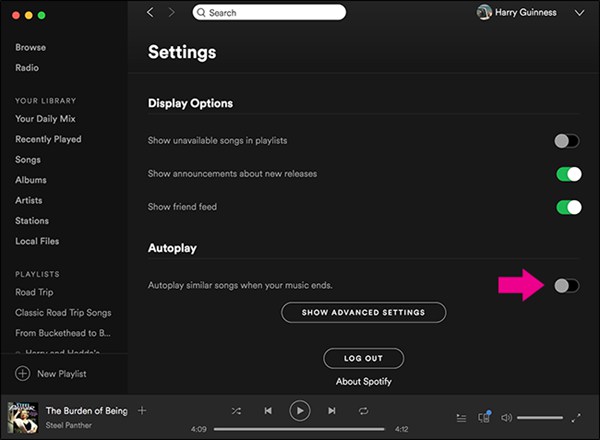
Step 2. Find the "Autoplay" column as listed below. Make sure that the toggle is turned off.
It is super simple, isn't it? Another method to save your cellular data when Wi-Fi connection is inaccessible is by saving your Spotify songs for offline. Let's see how to do it:
Part 3. How to Save Spotify Songs for Offline
To save Spotify songs for offline, what we need is an outstanding third-party program called TuneFab Spotify Music Converter. This software enables us to remove DRM protection from the Spotify songs so that we can convert Spotify songs from OGG Vorbis to MP3, WAV, M4A and FLAC. We can choose the popular music format as we wish and save it on your smartphone. Let's start the guide here.
Step 1. Download TuneFab Spotify Music Converter
Download and install TuneFab Spotify Music Converter. Then, you will see the main interface as below.

Step 2. Add Spotify Songs
Click on the "Add Files" button from the top menu. If you have Spotify app installed on your computer, you can drag songs from your Spotify into the program. TuneFab Spotify Music Converter allows you to drag and drop songs, playlists, albums, artists and tracks for converting. After that, hit on the "Add" button to move to next step.

Step 3. Choose Songs to Convert
As shown in the interface, you can browse and uncheck those you don't want to convert. After that, click on the "Add" button from the bottom right corner.
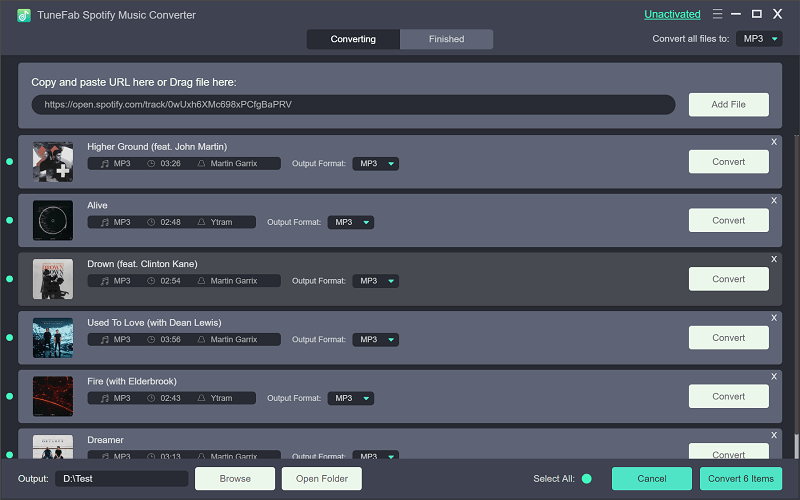
Step 4. Select Output Format
Before converting Spotify music, we can choose the music format as an output format so that you can enjoy it on your smartphone. Hit on "Options" > "Advanced". In the "Format" option, hit on the drop-down list and you will see "MP3", "M4A", "WAV" and "FLAC".

Step 5. Change Output Folder (Option)
In order to locate your Spotify songs easier, you can set up the output folder for your Spotify songs. Go to "Options" > "General". Hit on "Select..." to bring up the explorer folder that your Spotify songs are stored.
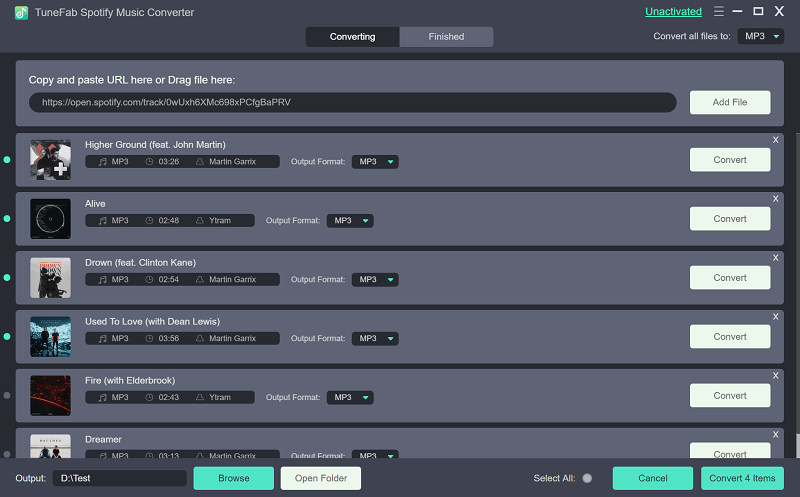
Note: I prefer set MP3 as the output format of my Spotify songs because MP3 is the most popular music format that widely used in most music player.
Step 6. Convert Spotify Music to MP3/M4A/WAV/FLAC
Click on "Convert" to start the conversion. As you can see, the process starts after you hit on the green "Convert" button from the top menu. You can stop the process any time you like by clicking the "Stop" button from the top.
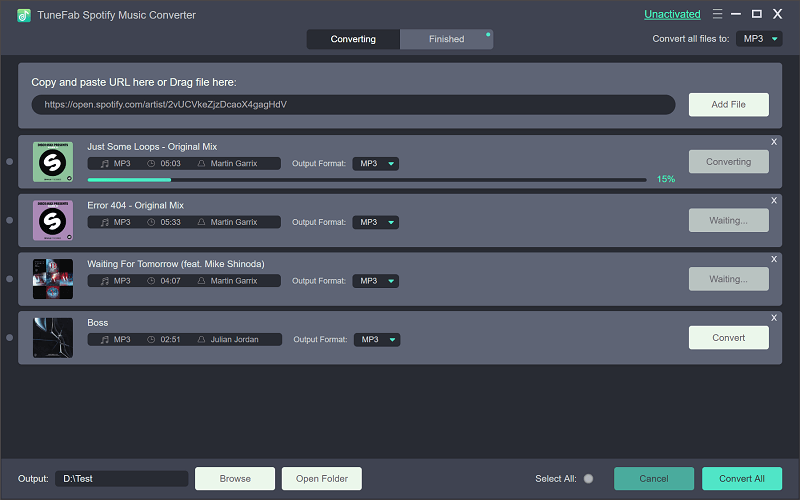
The process is not complex at all, isn't it? Why not download the software and try it on your own? Please feel free to try it on your own and let us know if you need any assistance while using.


