To make sure that the songs in your iTunes music library are well stored and can will be easily restored from any kind of data loss, you would be recommended to do backup for your iTunes library. There are many different ways for you to backup iTunes music library, such as iTunes Match, external hard drive, cloud storage services like iCloud and Dropbox and even outstanding third-party software like TuneFab Apple Music converter. The following guide will introduce 4 different solutions on how to backup iTunes library is listed below:
Don't Miss: Backup Your Apple Music Before Songs Disappeared
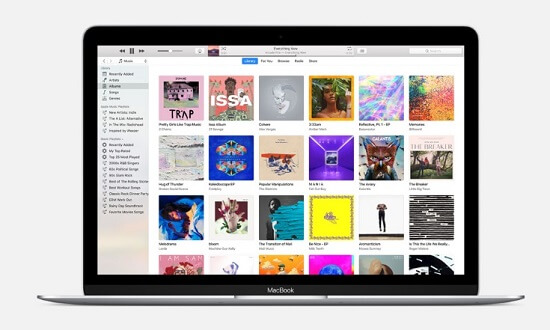
Part 1. Back up iTunes Library with iTunes Match
iTunes Match is an Apple cloud-based service to match your music in iTunes library with Apple Music Store. If you've got a copy of the music, you can get access to the music as 256kbps AAC files. There's not need to upload your music or use a web-based player to stream your music as Google Music and Amazon Cloud Player require. Let's see how to enable iTunes Match to back up your iTunes library music.
Step 1. Make sure you are using the latest version of iTunes on your computer and launch it.
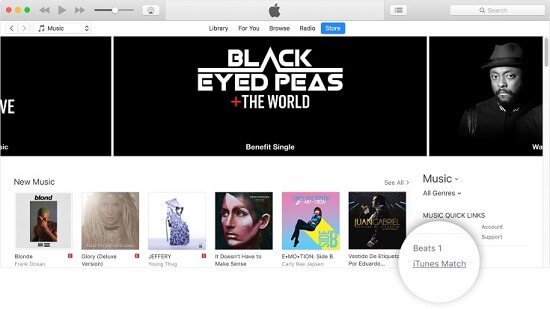
Step 2. From the top of iTunes, click "Store" and under the "MUSIC QUICK LINKS" section, you will see the iTunes Match entry.
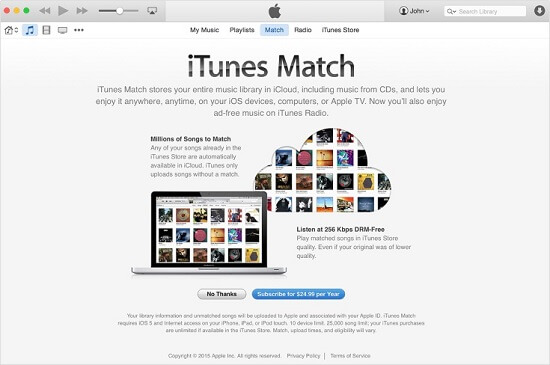
Step 3. Enter the link to enter the interface as below. Click "Subscribe for $24.99 per Year" to subscribe to iTunes Match and sign in your Apple ID and password to subscribe for iTunes Match.
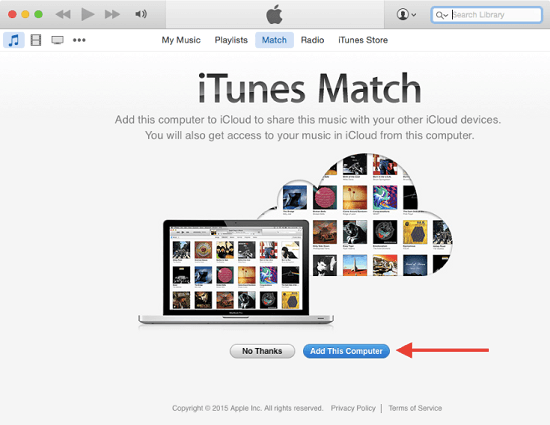
Step 4. Next time when you want to enable iTunes Match, go to "Store" > "iTunes Match" and click on "Add This Computer" and enter Apple ID password.
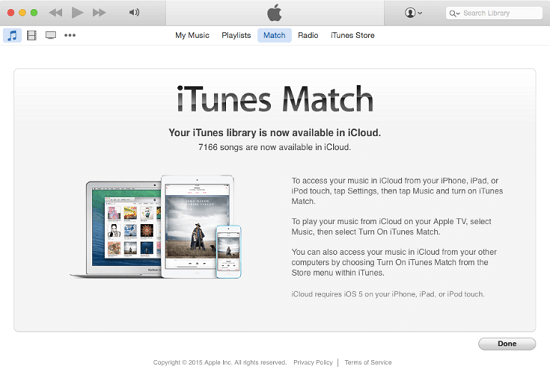
Step 5. You will get the following interface telling you iTunes library is now available in iCloud. Click "Done" to move on.
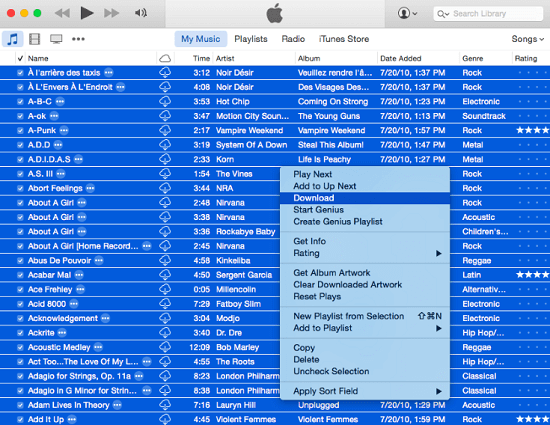
Step 6. In iTunes interface, go to the Songs view to check all the songs in your library. Hit the shortcut Command + A to select all the songs. Right click in the interface and you will see the "Download" option. Click on it and you can download the entire iTunes library to your computer as a backup.
Part 2. Back up iTunes Library with Cloud Storage
Method 1. How to Backup iTunes Library to iCloud
iCloud backup is safer but as iCloud doesn't support all file types that iTunes does, so there are no way to directly copy iTunes library backup to iCloud. However, if your purpose is to backup Apple Music from iOS device to iCloud, you can follow the steps below:
Step 1. Open iTunes on your computer and have your iPhone/iPad connected to your computer.
Step 2. Then, you might get a message asking you to enable the connection between iTunes and iOS, choose Trust This Computer to backup iTunes Library.
step 3. Choose your device as shown in the left side of the interface.
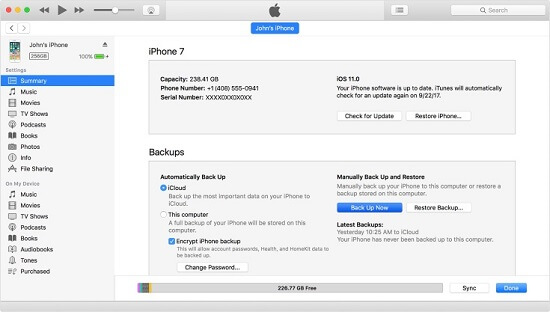
Step 4. Hit on "Summary" section and make sure "iCloud" is enabled in Backups section. Hit on the blue "Back Up Now" to start backup iTunes music to iCloud.
Method 2. Back up iTunes Library to Dropbox
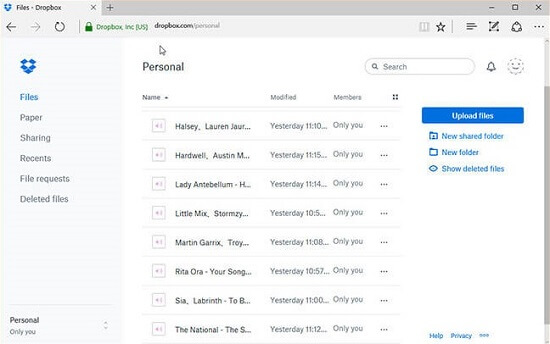
Another way to back up iTunes library to Cloud Storage service is to upload iTunes library to Dropbox. The steps are quite intuitive:
Step 1. Access to official site of Dropbox and login Dropbox account.
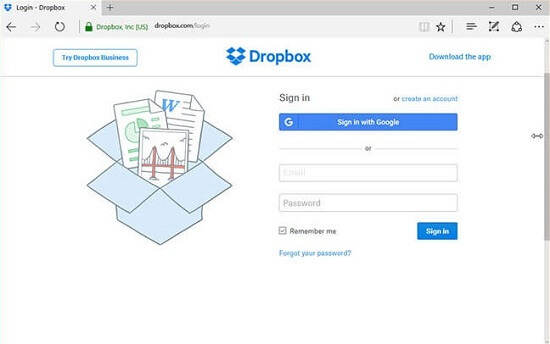
Step 2. Click on the blue "Upload Files" and browse your computer for iTunes backup folder to upload iTunes backup to Dropbox.
Step 3. Back up iTunes Library with External Hard Drive
To back up iTunes library to external hard drive, what you need first is to find your iTunes Media folder. Read on for the detail steps on Mac:
Part 3. Back up iTunes Library with External Hard Drive
To back up iTunes library to external hard drive, what you need first is to find your iTunes Media folder. Read on for the detail steps on Mac:
Step 1. Find iTunes Media Folder on Computer
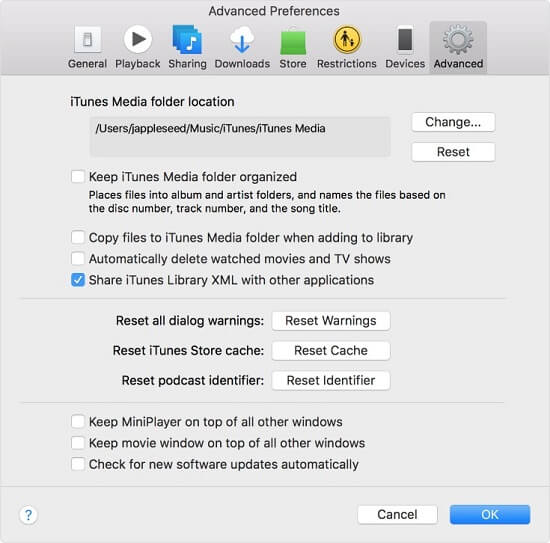
Launch iTunes on your computer and choose "iTunes" > "Preferences" from the interface to enter "Advanced Preferences" section. Then, choose "Advanced" tab and you will see your iTunes Media folder listed in the interface.
Step 2. Consolidate Your iTunes Library
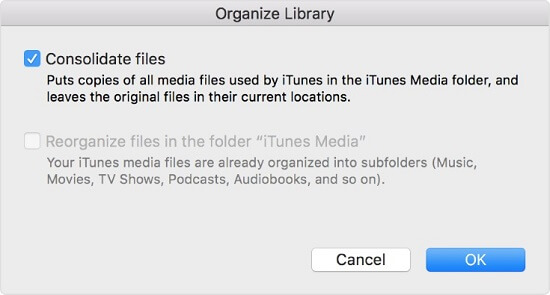
Open iTunes, go to "File" > "Library"> "Organize Library" and tick "Consolidate files" to put copies of all media files used by iTunes in the iTunes Media folder, and leaves the original files in their current locations. Then, hit on the blue "OK" button.
Step 3. Backup iTunes Library to External Hard Drive
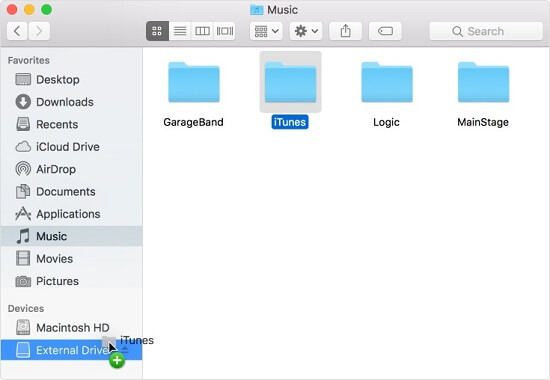
Make sure that your external hard drive is plugged in and detected by your computer. Then, quit iTunes and locate your iTunes Media folder. Then, drag the folder to your external hard drive listed in the left panel.
Part 4. Back up iTunes Music with TuneFab Apple Music Converter
Last but not least, there is one more way I would like to show you on how to back up iTunes music is to use the powerful third-party converter - TuneFab Apple Music Converter.
How TuneFab Apple Music Converter Backs Up iTunes Music
TuneFab Apple Music Converter is a outstanding tool to convert Apple music into MP3, AAC, WAV and more data on your computer for later use. Audiobooks, audio from iTunes videos and more data can be backed up to your computer easily with the help of TuneFab Apple Music Converter. Before converting Apple Music, the DRM restriction mode should be removed. TuneFab works perfectly to remove DRM restriction with ease. You just need to download a copy for your computer and follow the steps below.
Step 1. Install TuneFab Apple Music Converter on PC
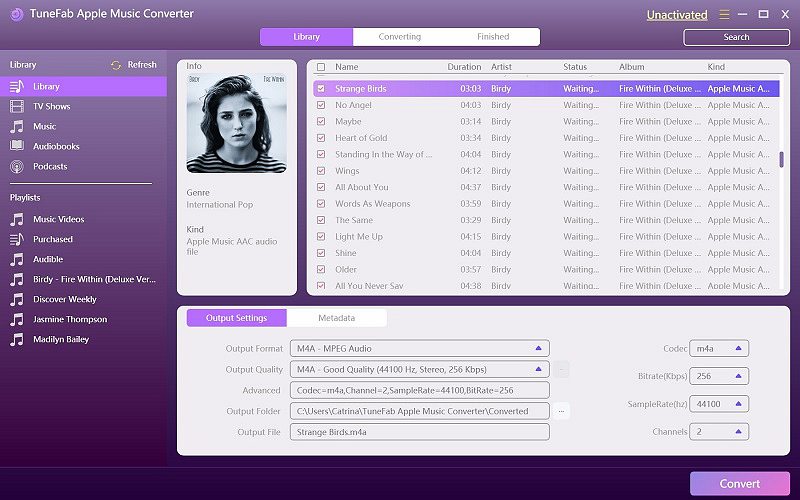
To start the conversion, you have to download a copy of TuneFab Apple Music Converter on your computer. Then, make sure that you have downloaded iTunes library on your computer. After finishing the installation, launch the program and your iTunes app will be brought up. And the files in your iTunes library will be detected and added to TuneFab Apple Music Converter automatically.

Step 2. Select Apple Music Tracks
All the playlist in your iTunes library will be listed in the left side bar of TuneFab Apple Music Converter. You can browse and select the music you would like to back up and click on it. The songs in the playlists will be listed in the right side. Tick in the boxes next to the songs you want to convert.
Step 3. Set Up Output Format
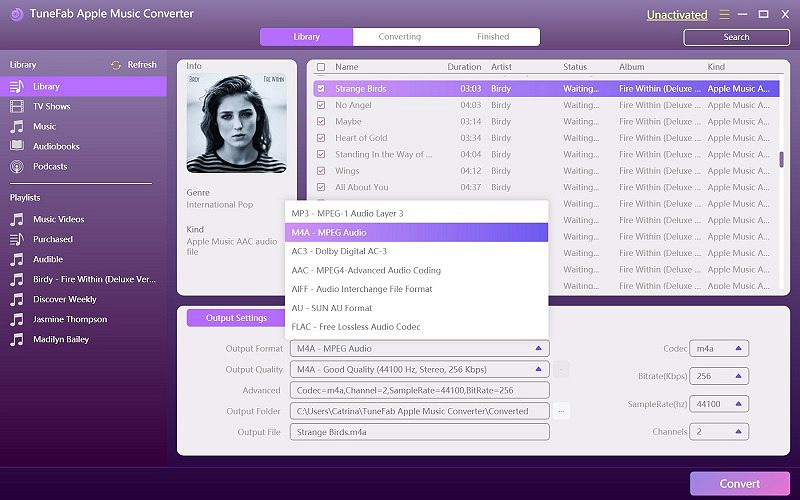
In the bottom of the interface, you will see a "Output Settings" option provides you with several options to choose output formats, output folders, biterates and sample rates.
Step 4. Start Backing Up iTunes to PC
After choosing all the songs you want to back up to your computer, hit on the "Convert" button from the top and the program starts backing up your iTunes library. Wait till the end of the process and you will see your iTunes music saved to the output folder you just set up and M4P files will be saved as MP3, M4A or FLAC as you wish.

Note: You can not only backup iTunes music to your computer, but also convert M4P music to MP3 and more regular music formats to play on various smartphones, media players and large screen players.
As you can see, all these 4 methods on backing up iTunes library are all simple and helpful. Each of them is chose by many Apple Music lovers. Try them on your own one by one to compare them and choose your ideal iTunes library backup solution.


